Wednesday, July 11, 2012

A Boy's Room

One of the best things about getting a new house is the chance to decorate from scratch. I loved my baby boy's room in our old house. I really, really did. I wanted to recreate it this house as well. However, his old room had the white board and batten around the bottom. Which would not have looked good with his wood trim windows.

We had some challenges in this room to deal with. Lets take a look at where we started:


Wood paneling, ugly carpet, fluorescent lights, and sparkly ceiling. Eww. 

Then when we removed the paneling:

We were left with a very torn up wall and a disgusting floor.


The process of fixing the wall was called "skim coating." It involved applying a very thin layer of sheet rock compound, "mud", to the entire wall and then sanding it off. I take no credit for this process. It was all my dad.

The closet was sacrificed make space in the bathroom. The hardwoods were laid, the walls and ceiling painted, here is what we got!


I should have made his bed. Oh, well. I was hard pressed to get pictures where nobody was messing up my work.


His sisters decorated his table with his tractors and his tractor blanket. There are now blinds on the windows, however the window treatments need to be reworked to fit the space. There is no baseboard yet, anywhere in the house. We have a wall picture above the dresser and table now as well.


I wanted antique firetrucks for our theme, like his old room. He wanted Lightning McQueen. This is the compromise. I detest character rooms. I really do. However, wall stickers are cheap and easily taken off when we get tired of them. So that is my concession.

His wardrobe and light are from Ikea. I heart Ikea. If only it wasn't so far away, I would be there much, much more. The wardrobe holds all his hanging and folded clothes. It has three drawers in it, and we still have an empty shelf to work with. Really awesome piece that was totally worth the drive to go get.

I will still be decorating this room for awhile. Only one outlet actually has power right now, so his lamp and Ipod are not in their final spots. We need something on the wall above his bed. A lime green rug is in his future. And a few other things, like baseboard, vent covers, and other boring constructions stuff.

I am pretty happy with this room. It is very little boy, and I kind of like it that way. He won't be little forever, so for now, we will just enjoy this stage of life.
Tuesday, July 10, 2012

A Sneak Peek

We are here! We are slowly getting settled into our new house and our perpetual construction zone. The progress is coming along. We now have a working kitchen, which is utterly fantastic. We had been eating takeout and restaurant food for far too long, but not anymore!


I can't wait to paint the cabinets. And maybe put some trim on the window. And the toe kicks. And the backsplash. And clear off some stuff on the counter. Oh, and drink the wine. I do love the wine.


And the fridge is touchscreen. It is amazing. We had no idea. That is what you get when you buy scratch and dent appliances. All I wanted was a child lock so my son could not flood my floor. And I get this amazing feature that shows me ingredient subsitutions, can show me a slideshow of my pictures, and be programmed for exact measurements of water to give small children. Like I said, amazing!


The living room. I need window treatments. I love the hardwoods. I love the paint color.


And I really love her :) And she loves her new house :)


More to come!!

Wednesday, June 27, 2012

Almost Pretty...

We are in the midst of packing away here. Less than one week until we load up that big moving truck and head off to our new town. There is much more done in our new house than I actually have pictures of. But here is a sneak peak of our new quartz counter top.


And my amazing new stove and dishwasher bought from the scratch and dent section of Nebraska Furniture Mart. The bottom "drawer" is a second oven. A real oven, not a warming drawer. I cannot wait to break that bad boy in. More on it later. My father in law asked me if it would sing to me, when I was describing all the amazing features. I will be sure to find out :)

Plans are still in place to paint the cabinets, but it will be sometime after we move in. We still need plumbing and a gas line ran to the kitchen. It is currently painted and the floor is in, however, I haven't even seen that so you all will have to be patient a bit longer.

Don't worry. This kitchen will look amazing when we are done with it!

Monday, June 25, 2012

Pink


There isn't much else to say. Other than it is very, very pink. The photos do not do it justice.


That is a semi repair shop across the street out the window. My son is in heaven.


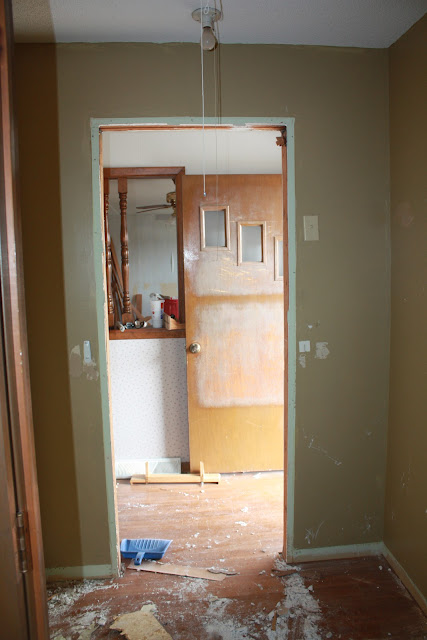
See the hallway? Distressing isn't it? Boy that was a hot mess of wallpaper.

 But, pink is divine. And my girls are happy. And so am I.

Wallpaper Hate


Let me really share the wallpaper drama with you. People, wallpaper is awful. As is I-hate-the-inventor-of-wallpaper awful. It is messy and ugly to put up. It is ugly on the wall. It is messy and ugly to take down. I cannot stand wallpaper. Really, I cannot.

Let me give you a brief sample of my fight with this paper. We shall be looking at the master bedroom. The one with the ducks. Now, on the previous walls, the paper came off after being drenched in water, and some scraping. It was not pleasant, very messy. But it did come off with little wall issues. The walls required minor repair, washing of the glue, and ready to paint. However the ducks put up a heck of a fight.


They were bound and determined to live forever. Practically impossible to get off. And the paper underneath? Forget about it.  So time to call in the big guns.


A wallpaper steamer. So, out come this glorious product from the box, it gets filled, and then takes 15-18 minutes to begin steaming. Or 25. You know, same difference. So you step away and look for your Diet Coke, only to take a swig and discover it tastes like sheet rock dust. Everything tastes like sheet rock dust. You stomp around and look for your drill to begin taking off outlet covers. You discover your husband has drained the battery and not plugged it back in. So you go looking for something else to drink, and have to settle for water. Even thought it is late.

Finally the machine begins spewing steam and boiling water. You pick it up and promptly scald your hand as the boiling water runs down your arm. You speak some foul words, climb up on the death ladder, and begin steaming.

It steams and bubbles, and off comes the wallpaper. 


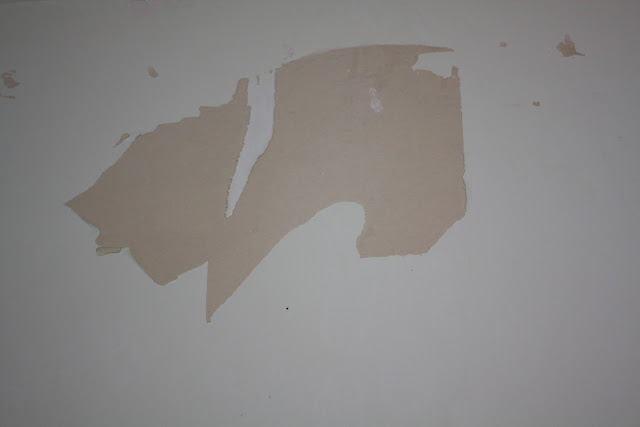
And the sheet rock paper. That makes me sad. And it makes me say bad words. And the entire wall looks like this. Nice.

It can be repaired. But seriously, I hate wallpaper. And I will probably always hate wallpaper.

Tuesday, May 29, 2012

Little Helper

 The new counter is in and so fabulous! I can't wait to get some pictures of it. And the girls' room is also painted! It is very, very pink.

Until then, the scraping of the wallpaper continues:


Me: What are you doing?
K: I'm pulling off this paper on the wall. 'Cause is is very, very ugly.

Saturday, May 26, 2012

Starting to Look Like a Kitchen!

So, in the last month, a few things have happened. First, we have sold our existing big city house. YAY!! It was a stressful process that involved 22 showings in 10 days, two offers that fell through, and practically every meal eaten out. However, on July 6, we will officially be done with the old, and ready for the new!

Our oldest made her First Communion on her birthday. And I completed my Masters. April was a busy, busy month. Now that school is officially over, the real work must be stepped up a bit!

Now, on to house progress. You may remember what the kitchen look like when we first bought the house:


Lovely.

And shortly after we gutted it:


All opened up


And torn all the way to the studs.

The ceiling eventually came down too. 

I will not bore you with the middle action. It involves wiring, plumbing, and drywall. Mudding and sanding drywall is not fun. Not fun to do, not fun to talk about, not fun to read about.

So we are skipping it. Right to where the cabinets are now set on the floor. And the walls are up. 


Can you see my vision, yet? Because I can!

  
(VISION)
The layout will look somewhat similar to the above. I have several pictures on Pinterest of kitchens that I have found that will work for the layout that we have to work with. This is the general finished idea, with a few appliance changes, and pretty white cabinets. 


 These are the cabinets from the house. We have been able to reuse the, only in a slightly different layout. the stove goes in the big empty space on the big blank wall. The sink goes under the window, with the dishwasher directly beside it. The refrigerator will go on the wall you cannot see, along with a pantry cabinet, to be built in the future. By using what we had, we saved a fortune on new cabinets. The quartz counter top will be installed this week. Quartz is very similar to granite, except that you do not have to seal it. Ever. That is fabulous. 

Nutmeg counter top
The counter top was a steal. We purchased it from a reminent sale at the installer here in town, the same installer that the big stores use and who would have installed it for us wherever we had bought it. By picking out a reminent, we ended up saving well over $3000 on our counter.  For that price, I was more than happy to pick out a slightly different color counter than I originally would have chosen. I think it will look fabulous with white cabinets, don't you?


The counter gets installed this Tuesday. I will be there to take pictures of the beautiful product. In the meantime, we will be picking out paint this weekend and heading up there as soon as I wake up tomorrow. It is coming together quite nicely! I cannot wait to see it done!


Sunday, April 8, 2012

Bathroom No More

So there once was this bathroom

A bathroom completely unsuitable for a family of five. Not to mention in desperate need up updating. However, you turn your back on a couple of guys for a few seconds, and here is what you get...


A really big mess. My dad and Matt had that torn completely out before I even got a chance to take pictures of the process. And I do mean destroyed. We hauled out the 800 pound bathtub in one piece, but everything else got smashed to bits. The view here is from the boy's closet. He has lost his closet in the quest for a bigger bathroom. Eventually, he will get a new one. Probably not right away, but maybe in a couple years.


After said extremely heavy bathtub came out, there was a lot of water damage to the floor. Since we are changing the layout of the bathroom anyway, we have to change the plumbing around. So, out came the floor with it.


There is a beam in the middle of the doorway now, since it will be walled off. The new door will be just to the right of the old one. It makes the space easier to walk in, put a big tub and double vanity in. I've already bought my jetted tub, which was my main request for this bathroom, and I have my vanity all picked out. Just have to go get it.

The existing taupe wall is where the closet was. You can see how much larger it makes the space in there.


The boy will gain a new closet someday in the future. But he is a toddler. And a boy. He'll be OK for a while.

As I am writing this, it is all plumbed correctly. The sheet rock is back up on the wall. And soon, it will be a pretty fancy bathroom.

Demo is practically done, now. So keep staying tuned for the putting it all back together pictures!

Tuesday, April 3, 2012

Closet Smashing

As much as I would like to work on my new house every day, I have a real job to attend to on the weekends. Oh, and I am 150 miles away. So fun projects have to wait for real life to get out of their way.

Before we bought the house, I'd only actually seen it once. And it was utterly full of crap. Furniture, games, a band, a Christmas tree, you name it. So I had a pretty good idea of what I wanted to do, and of course spent hours planning dreaming how it would look. The master closet was no exception. I built up this perfect storage system in my head that would make that little closet look so awesome.

Well, that's not gonna happen. Cause the closet is much, much smaller than I thought. 

Make sure you fully appreciate the duck boarder :)

It just so happens, exactly on the other side of that back closet wall, is another closet, a coat closet for the front door.

The dimensions were exactly the same. No load bearing walls. And a second closet in the living room can be used instead of the coat closet.  It was almost too easy. 


That door is bad. Yes, it is. 

By knocking down the existing wall between the closets, we more than doubled the space we have in the master closet. It was quick and easy to do. Very satisfying. 


Now all we have to do is patch the wall, redo the floor, and close off the old doorway to the old coat closet. It was a tremendously easy project to do.

Wednesday, March 28, 2012

Let's Talk About Wood Paneling

So, lets talk about wood paneling. You all have seen the style, that wood stuff so popular when many of us were young. You just nailed it up there and voila! instant wall covering.


This room was covered in the stuff. So of course, down it came. Now, if you ever have to do this, you should remove the baseboard first. It makes it a lot easier. The top trim came down with the paneling. So before, we have this lovely paneling, fluorescent light, and counter top desk.


In case you haven't quite figured out the orientation to this room, it has two doorways. This doorway looks into the kitchen. It will get closed off soon. The other doorway is in the hallway, where normal bedroom doors are located.

The paneling came down in entire sheets for the most part. Super easy, just pop off the baseboard, pry a corner loose with your handy-dandy crowbar, grab, and pull. Off comes the sheet. Do not get stabbed by wayward nails. 


If you look closely, you can see the nail tracks in the wall. All that is required is to pop out the nails and fill the holes. Then, it's ready for it's new coat of paint.


The closet. See it now? Cause soon, it's getting a makeover too. Also, I would like you to note the ladder. A garage sale model that we stole from Matt's mom and have bolted together several times. We have decided, after both nearly breaking our necks in this endeavor, to treat ourselves to a new one this weekend. So we don't die. That is very important.


And the carpet is gone too. After pulling up all the carpet, I think we've decided to go with hardwoods throughout the house. We were not lucky enough to find that underneath the floors, but no matter. But let me tell you something. I know that carpet had been there awhile. But when we pulled it up, there were entire piles of dirt and dust on the floor. It was disgusting. The carpet, the pad, and the floor underneath were all nasty.  And after pulling up every single carpet tack, many of which fell apart in our hands, I was pretty bent on only hardwoods.

We thought that was the only paneling in the house. We thought. Remember that wall the girls were tearing the paper off so easily? The dining room wall? Well, there was some sort of paper cover on the wall that the paper was sticking to. And under that? Yup, wood paneling. Although, when we attempted to tear that off, there was another unpleasent suprise. Somebody loved that paneling so much, they wanted to look at it on the wall forever. So they glued it to the wall. And of course, you can guess what happened when we ripped it down.


Yeah, ruined. Totally. So that wall came down too.We let Emily have her hand at this one.


I think it was good for her :)

After it was all torn down, this is what we were left with.


A nice, big, open kitchen/dining area that flows right to the living room. Perfect :) I mean, except for that door there.


There. I can live with that!

Tuesday, March 27, 2012

Knocking 'Em Down

What you see now is more kitchen demolition. It took the better part of a few days to totally complete this. We did skip around quite a bit. Sometimes we'd work in here, then go rip up carpet or something. Then we'd come back to the kitchen.

The big ugly boxes on the ceiling came down, and that little wall came down as well. You can see the studs in this picture. I need to take another of all those studs gone. Now that the load is off that wall, it is totally opened up. Note the garage door placed smack dab in the kitchen. It's getting moved. Under the wallpaper was green paint and even uglier wallpaper.


 The bulkheads are big, empty boxes designed to lower the kitchen right over where the cabinets would be. I am sure this was stylish at some point. It is not anymore.

Taking those down was hard, hard work. I won't lie. This is where the demo really started to become not so fun. Matt said a tornado could wipe away the whole house, and all that would be left is this square in the middle of the kitchen where the boxes were built. All plywood and boards and sheet rock. 


 Once we took all that off, we literally had to cut the boards out to make it budge. It took awhile. But they are gone. And it enlarges the room so much.


 As I began taking off other paper and tile, I discovered the sheet rock was totally ruined under it. In several places. This is what led to the total gut job of the kitchen. Every single wall ended up coming down, and the ceiling too.There simply wasn't anything we could do to save it. The bright side is that now I have an entirely clean slate to work with. If you follow me on Pinterest, you have seen the enormous amount of kitchen pictures I have pinned. I have one particular picture all picked out for the layout that should work almost perfectly. We shall see.

And the trash pile. My tender little hands were very tired after cleaning all of this up.

I hope you are enjoying our journey so far. There are still demo pics to come of the rest of the house. Then, it will be on to the fun part, putting it all back together!

Back off, folks. I got this one.